Up and Running with Hotwire Native Android Part 2 - Path Configuration
Path Configuration is probably the most fundamental concept to learn with Hotwire Native on both platforms. This is what enables us to display modals, reset sessions and even navigate to native screens.
In the last post, we got up and running. When we click around, we can see that the app doesn’t feel native. Especially when it comes to saving forms.
Let’s change that.
Creating a local Path Configuration file
Compared to iOS, there is a little bit more work to get up and running.
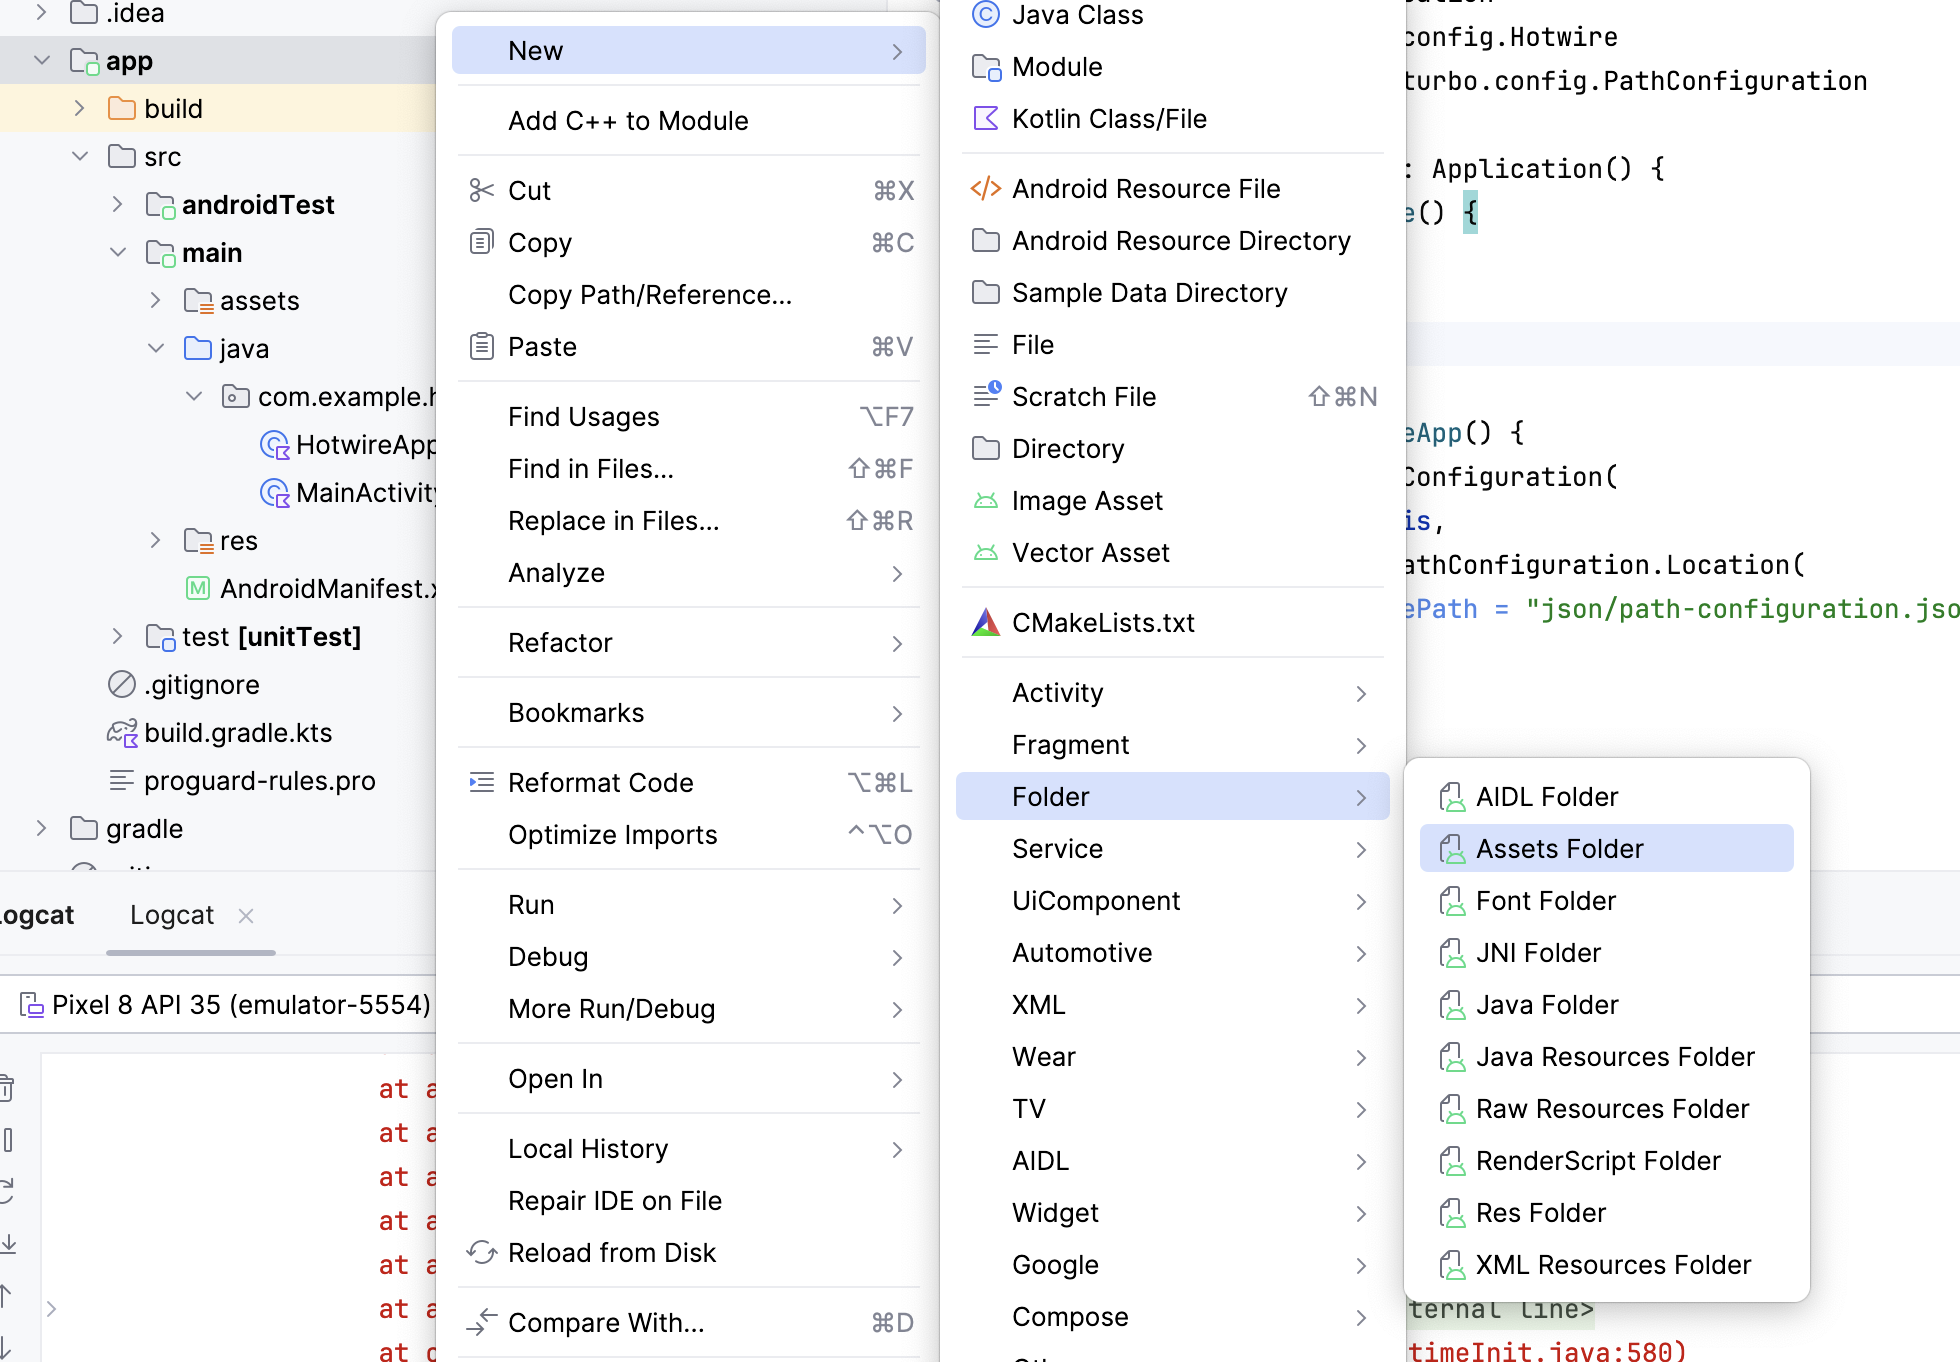
First, we create an assets folder in our app.
To do this, we hover over the app directory and right-click, then it’s New > Folder > Assets Folder

Next we create a sub-folder called json and then create a new file called path-configuration.json which should look like this.
{
  "settings": {},
  "rules": [
    {
      "patterns": [
        ".*"
      ],
      "properties": {
        "context": "default",
        "uri": "hotwire://fragment/web",
        "pull_to_refresh_enabled": true
      }
    },
    {
      "patterns": [
        "/new$", "/edit$"
      ],
      "properties": {
        "context": "modal",
        "uri": "hotwire://fragment/web/modal/sheet",
        "pull_to_refresh_enabled": false
      }
    }
  ]
}
Now we have two more steps.
Let’s create a new file called HotwireApplication(or whatever your app is called).
class HotwireApplication: Application() {
    override fun onCreate() {
        super.onCreate()
        configureApp()
    }

    private fun configureApp() {
        Hotwire.loadPathConfiguration(
            context = this,
            location = PathConfiguration.Location(
                assetFilePath = "json/path-configuration.json"
            )
        )
    }
}
Quick tip
We can also download a path configuration file from the server which will take preference over the local one.
Hotwire.loadPathConfiguration(
    context = this,
    location = PathConfiguration.Location(
      assetFilePath = "json/configuration.json",
      remoteFileUrl = "https://example.com/configurations/android_v1.json"
    )
)
This is useful because it means you can deploy changes to your app without having to get app store approval.
Android Manifest configuration
Next, in your AndroidManifest, change the name of your app to correspond to this class.
<application
    android:name=".main.HotwireApplication"
    android:allowBackup="true"
    ....
    </application
Now run the app and voilá.
Every time you navigate to a route that ends in /edit or /new, we get a modal.
All without creating custom components.
Next steps
As we already mentioned at the start of the article, path configuration is the most important concept to understand with Hotwire native as it allows you to make simple changes to your app without having to get app store approval. It also allows you to navigate to native screens.
In Android, there are two ways to render native screens which we will cover in the next article.
Until then, happy hacking.