Up and Running with Hotwire Android Part 1 - Setup
If you’ve been following along with my Hotwire iOS series, then you know that we finished up with learning how to display a custom keyboard extension.
In the next 4 articles, we’re going to explore using Hotwire Android. First, we’ll start with setting up our app, then move on to displaying native screens, bridge components and finally finish up with a custom keyboard extension.
Background (feel free to skip)
I assume most readers of this site are already familiar with Hotwire but let’s just give a quick background.
Hotwire is a collection of libraries for the Web, iOS and Android that focus more on the ergonomics of marking up the HTML that you render from the server. This is in contrast to something like a Single Page Application framework such as React which generates the HTML on the fly and “Reacts” to state changes based on input, usually from a JSON endpoint.
At the heart of Hotwire is a library called turbo.js which handles page navigations without a doing a full browser page reload as well as few extras such as caching.
The benefits of working with a library such as turbo.js is that you get a lot of the benefits of an SPA without the development downside that comes with SPA’s.
Let’s Setup Our Rails App
Hotwire Native has a symbiotic relationship with turbo.js. As long as you have turbo.js handling navigation, you’re good to go. You can use turbo.js with any backend framework but it comes as a default with Rails.
If you don’t have a app ready, let’s create one quickly. I’m assuming that you have rails 7.2+ installed.
rails new hotwire_native_todo
Create a quick scaffold.
rails g scaffold Todo title:string complete:boolean
Migrate the database.
rails db:migrate
Now let’s set the home page to the todos index.
In our config/routes.rb
Rails.application.routes.draw do
  resources :todos
  root "todos#index"
end
Finally, to make it look pretty, lets add simplecss to our application layout.
<!DOCTYPE html>
<html>
  <head>
   ...
    <link rel="stylesheet" href="https://cdn.simplecss.org/simple.min.css">
  </head>
<body>
   ...
So now we start the rails server then move on to our iOS app.
bin/rails s
When you navigate to localhost:3000, you should see your shiny new Rails app.
Setting up out Android App
Android Studio New Project
First, make sure you have Android Studio installed.
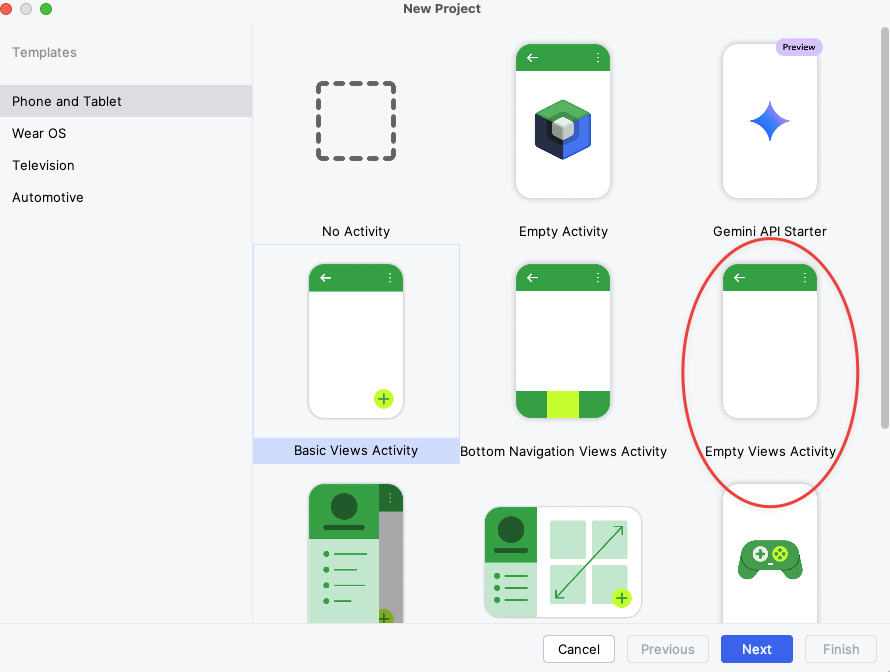
File -> New Project -> Empty Views Activity

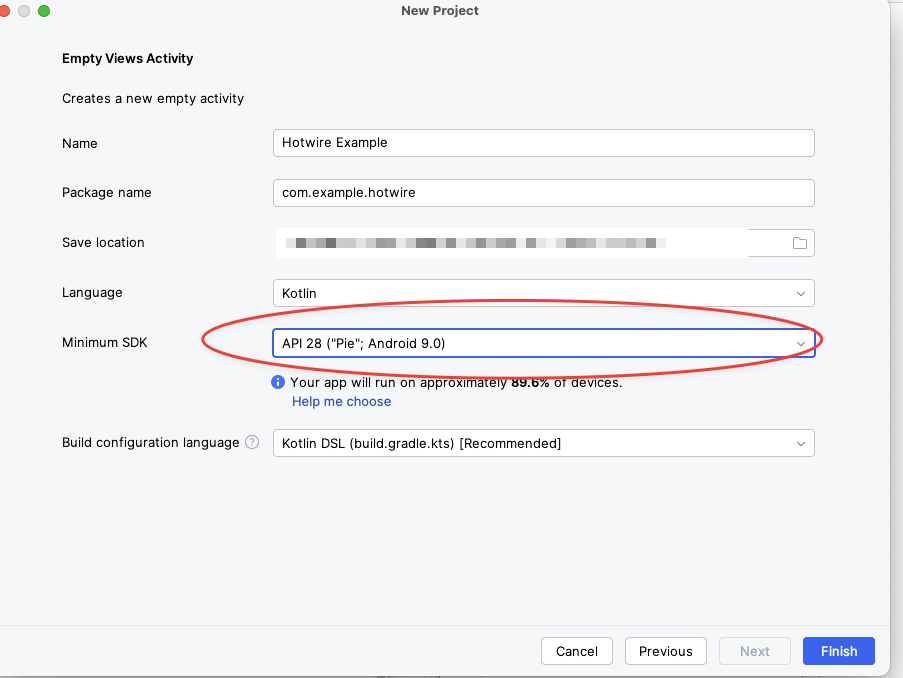
Next, we set the minimum SDK to 28

Install Hotwire
Find the latest release number here.
Now navigate to our build.gradle.kts file for the app folder and add the following then sync changes.
dependencies {
    implementation("dev.hotwire:core:1.1.0")
    implementation("dev.hotwire:navigation-fragments:1.1.0")
}
Optional Use libs.versions.toml
This is the fastest way to get setup. Alternatively, you can follow Android convention and use the libs.version.toml file. This file is Gradle’s way of centralising dependencies in your app.
Think of it as the part of your Gemfile or package.json file that has the version numbers.
In our libs.version.toml file, add the following and sync changes.
[versions]
...
hotwire = "1.1.0"

[libraries]
...
hotwire-core = { module = "dev.hotwire:core", version.ref = "hotwire" }
hotwire-navigation-fragments = { module = "dev.hotwire:navigation-fragments", version.ref = "hotwire" }

[plugins]
...
In our build.gradle.kts file, we can now do the following which should work with code completion.
dependencies {
    implementation(libs.hotwire.core)
    implementation(libs.hotwire.navigation.fragments)
    ...
Now we should be able to sync our changes and be ready to rock.
Enable Internet permission in Android Manifest
In our Android Manifest file, add the following just before Application:
<uses-permission android:name="android.permission.INTERNET"/>
Allow CleartextTraffic in Android Manifest
To allow localhost, we need to also enable CleartextTraffic.
<application
    android:allowBackup="true"

    android:usesCleartextTraffic="true"
    android:dataExtractionRules="@xml/data_extraction_rules"
    ....
</application>
Setup layout
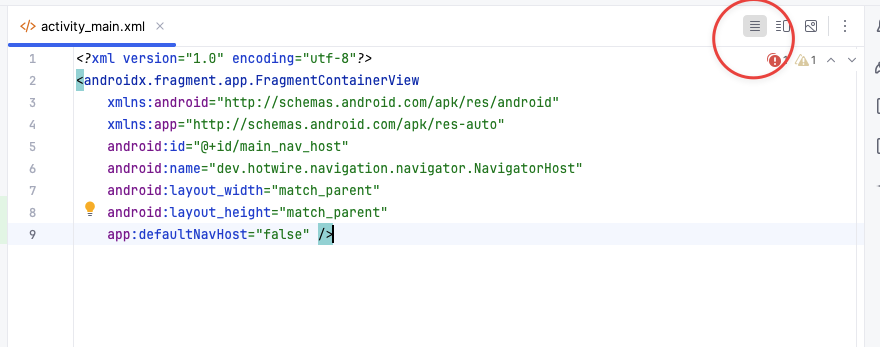
Now open up the activity_main.xml file under res.layout and click the following icon

Now add the following code:
<?xml version="1.0" encoding="utf-8"?>
<androidx.fragment.app.FragmentContainerView
    xmlns:android="http://schemas.android.com/apk/res/android"
    xmlns:app="http://schemas.android.com/apk/res-auto"
    android:id="@+id/main_nav_host"
    android:name="dev.hotwire.navigation.navigator.NavigatorHost"
    android:layout_width="match_parent"
    android:layout_height="match_parent"
    app:defaultNavHost="false" />
Configure Main Activity
Finally, we are nearly ready. In our MainActivity.kt file, MainActivity with the following:
import android.os.Bundle
import dev.hotwire.navigation.activities.HotwireActivity
import dev.hotwire.navigation.navigator.NavigatorConfiguration
class MainActivity : HotwireActivity() {
    override fun onCreate(savedInstanceState: Bundle?) {
        super.onCreate(savedInstanceState)
        setContentView(R.layout.activity_main)
    }

    override fun navigatorConfigurations() = listOf(
        NavigatorConfiguration(
            name = "main",
            startLocation = "http://10.0.2.2:3000",
            navigatorHostId = R.id.main_nav_host
        )
Ensure that you import the relevant libraries.
Finally, Click Run → Run ‘app’ to launch the app in the emulator or CTRL + R.
Conclusion
That’s everything setup and ready to go. However, it does lack that native feel. In the next post, we’ll touch on adding Path Configuration so we can display modals every time we navigate to /new and /edit.
Until next time.