Up and Running with Hotwire Native iOS 2 - Native Screen
When I left you the last time, we had a modal that displayed every time we navigated to a route that ended in /new or /edit.
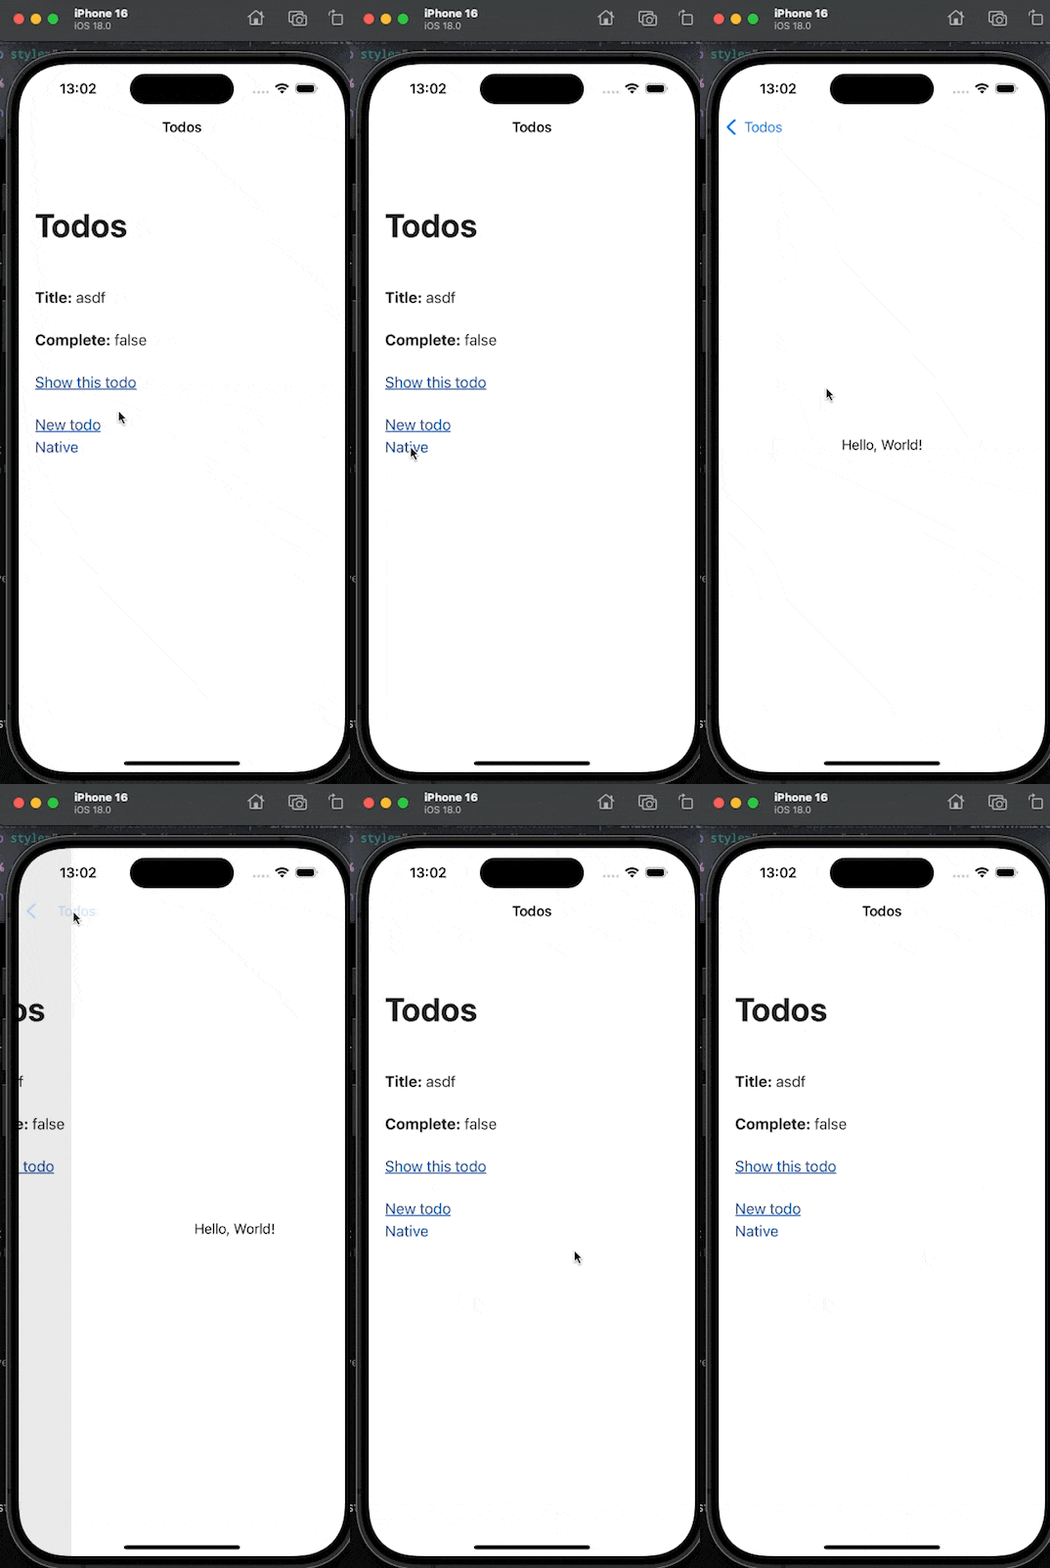
We are not limited to modals though. We can go further and even navigate to native screens.
Adding a Native Screen
Background (feel free to skip)
When consulting clients, I recommend against building native screens unless it’s necessary. The benefit of Hotwire Native is that you render the HTML from the server which reduces the number of screens that you have to build.
Despite my warning, there are some advantages to native screens. For example:
- Complex inputs benefit from native GPU acceleration
- Can render if app is offline
- Can easily hook up to a local db to sync data later when app comes back online
There are trade-offs and native screens require knowledge about iOS and it’s various ecosystems. It’s important that you know that it can be a big journey adding native screens.
Process
There are 3 steps to adding a native screen
- Adjust our path configuration file.
- Create a UIViewController with the
PathConfigurationIdentifiableeprotocol. - Update or add a handle method for the navigation in our navigator delegate class.
In our Rails app, let’s add the following to our todos/index.html.erb
<%= link_to "Native", "/native" %>
Now back to Xcode, in our Path Configuration, add a new rule so that when someone navigates to /native, they arrive at our native screen.
{

  "settings": {},

  "rules": [
  ...
    {

        "patterns": [

            "/native"

        ],

        "properties": {

            "view_controller": "hello"

        }
    }

  ]

}
Aside: Note that the property is called view_controller and has a key called “hello”. You’ll see how useful this is later because it allows us to refactor our view controllers without having to update multiple files and is closer to Hotwire Native Android in terms of navigation.
Let’s create a SwiftUI view for our ViewController.
In Xcode, you press CMD + N and select SwiftUI from the dialog. Call the file HelloView and click Create.
import SwiftUI

struct HelloView: View {
    var body: some View {
        Text("Hello, World!")
    }
}

#Preview {
    HelloView()
}
Let’s create a new ViewController which will render the SwiftUI view.
In Xcode, you press CMD + N and select Swift file from the dialog. Call the file HelloViewController and click Create.
import UIKit
import HotwireNative
import SwiftUI

class HelloViewController: UIViewController, PathConfigurationIdentifiable {
    static var pathConfigurationIdentifier: String { "hello" }

    override func viewDidLoad() {
        super.viewDidLoad()

        let childView = UIHostingController(rootView: HelloView())

        addChild(childView)
        view.addSubview(childView.view)
        childView.view.translatesAutoresizingMaskIntoConstraints = false
        NSLayoutConstraint.activate([
            childView.view.topAnchor.constraint(equalTo: view.topAnchor),
            childView.view.bottomAnchor.constraint(equalTo: view.bottomAnchor),
            childView.view.leadingAnchor.constraint(equalTo: view.leadingAnchor),
            childView.view.trailingAnchor.constraint(equalTo: view.trailingAnchor)
        ])

        childView.didMove(toParent: self)

    }
}
NSLayoutContraint is a class that manages the Auto Layout. We have to use it in this fashion so the child view is effectively the parent view.
Note: You don’t have to use SwiftUI and can use Storyboard, xib files and even build with UIkit directly. This is a personal preference. I happen to like SwiftUI which is why I am using it.
The final step involves us setting up the navigation inside the the SceneDelegate class. This involves adding an extension to the SceneDelegate class called handle.
In our SceneDelegate file, add the following:
extension SceneDelegate: NavigatorDelegate {
    func handle(proposal: VisitProposal) -> ProposalResult {
        switch proposal.viewController {
        case HelloViewController.pathConfigurationIdentifier:
            let helloViewController = HelloViewController()
            return .acceptCustom(helloViewController)
        default:
            return .accept
        }
    }
}
Then ensure that you have the delegate set up for our navigator
 class SceneDelegate: UIResponder, UIWindowSceneDelegate {
   var window: UIWindow?
..
+  private lazy var navigator = Navigator(delegate: self)
...
Now rebuild the app (CMD + R), click the /native link and voilá.

Native screens are cool but do you know what’s even cooler than being cool?
ICE-COLD!!
Yes ice-cold is usually the logical response but that doesn’t make sense given that we are talking about Hotwire Native. I’m talking about Bridge Components.
In the next post, we’re going to add some native touches that are triggered by Javascript that we run on out own server. This is the secret sauce to building a truly great hybrid app.